It’s beginning to look a lot like… Halloween! The leaves are starting to fall, our list of scary films to watch is growing longer and spooky season is well and truly here.
Things are a little bit different here this year with Ottie’s arrival a couple of weeks ago. Because I had a c section I’m not able to drive or lift heavy things until next month meaning a trip out to collect pumpkins is not really on the cards.
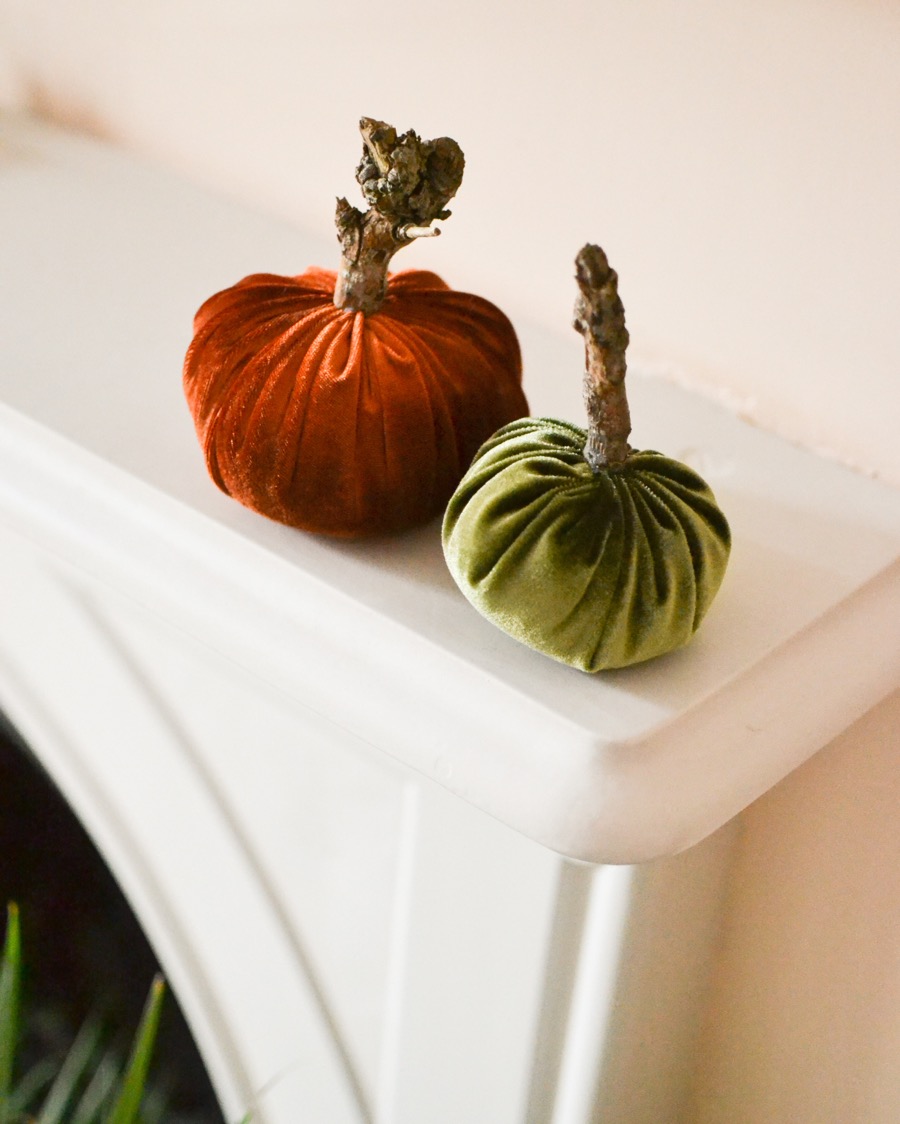
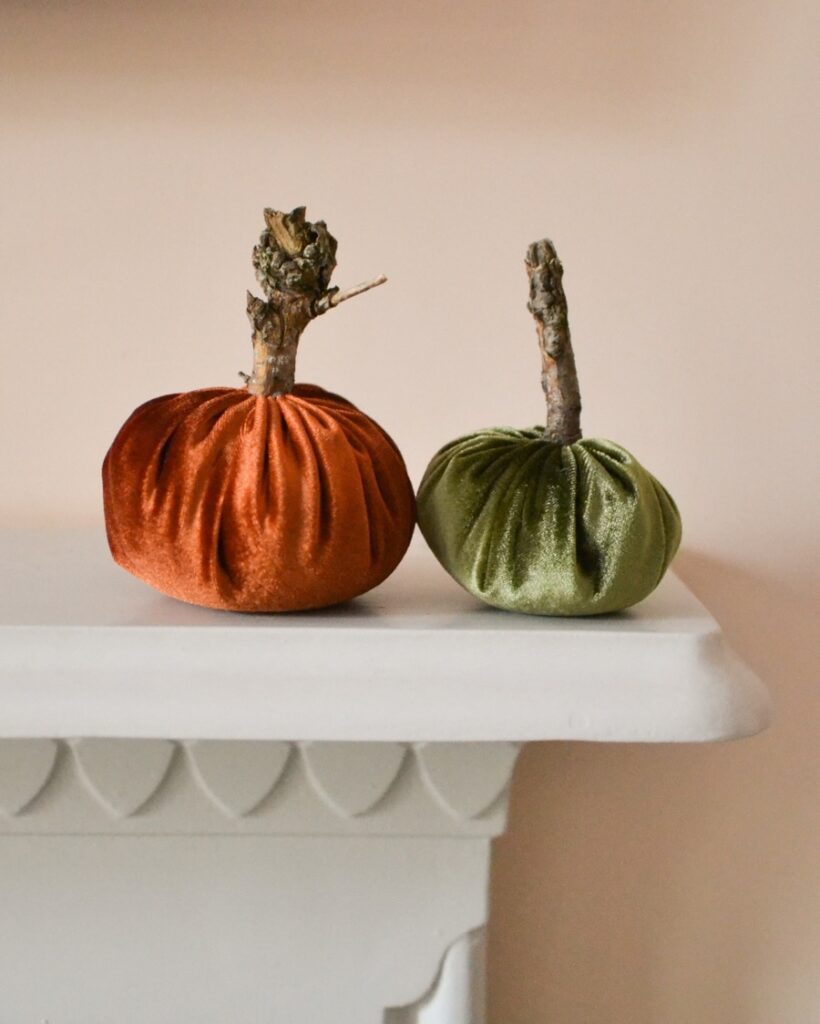
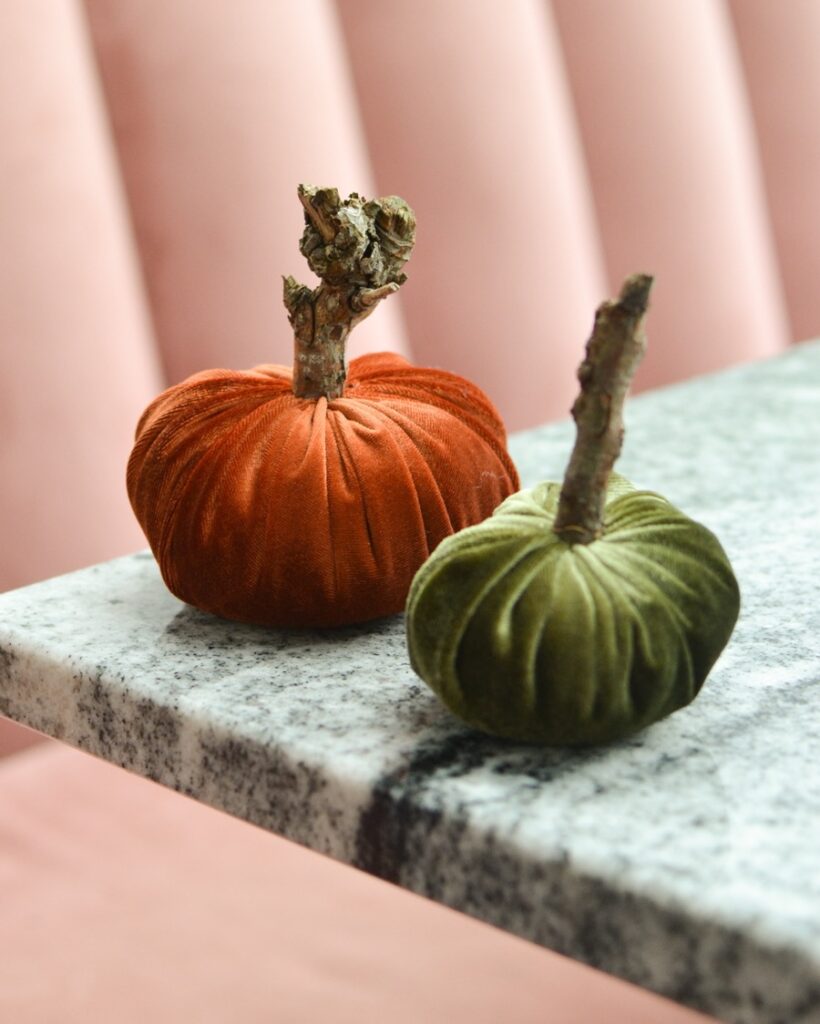
Instead I decided to do a quick little Halloween DIY to make velvet pumpkins so we can still get in the spirit with minimal effort. I’m not going to lie, if I can squeeze in a family pumpkin patch visit one weekend I definitely will but these will do for now!
These two little velvet pumpkins took me about 20 minutes to make from start to finish so it’s a pretty quick DIY!
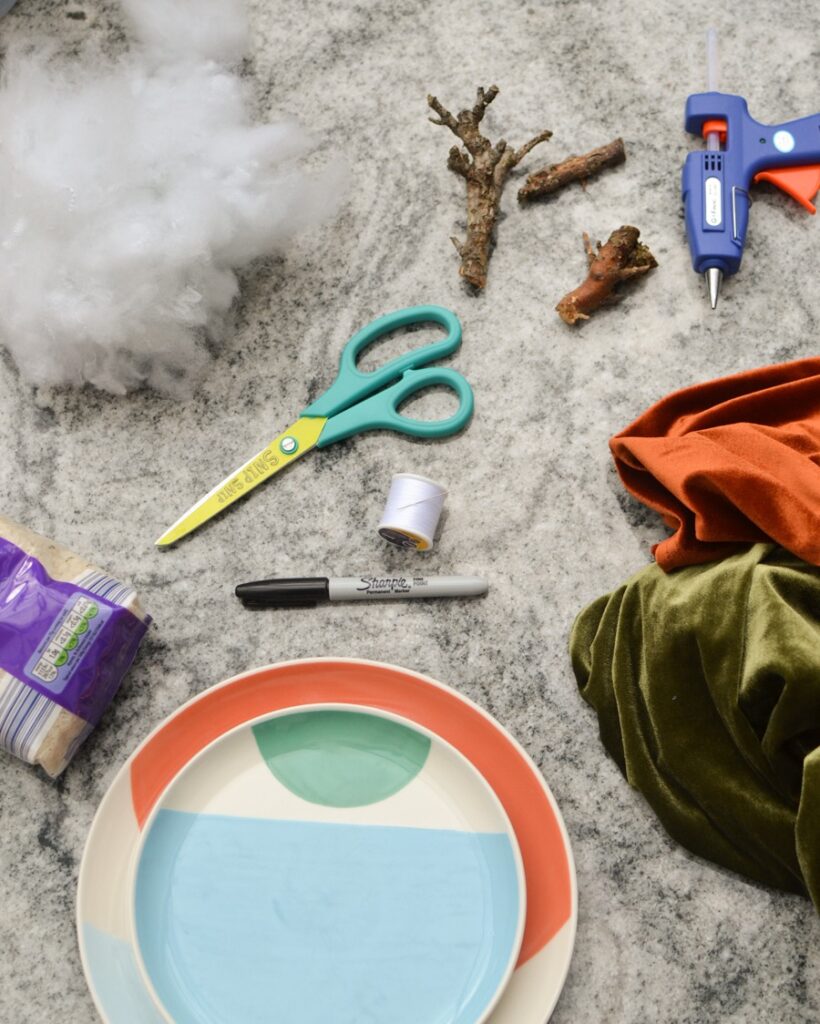
You will need:
- Scissors
- Fabric (I used orange and green velvet dresses from the charity shop)
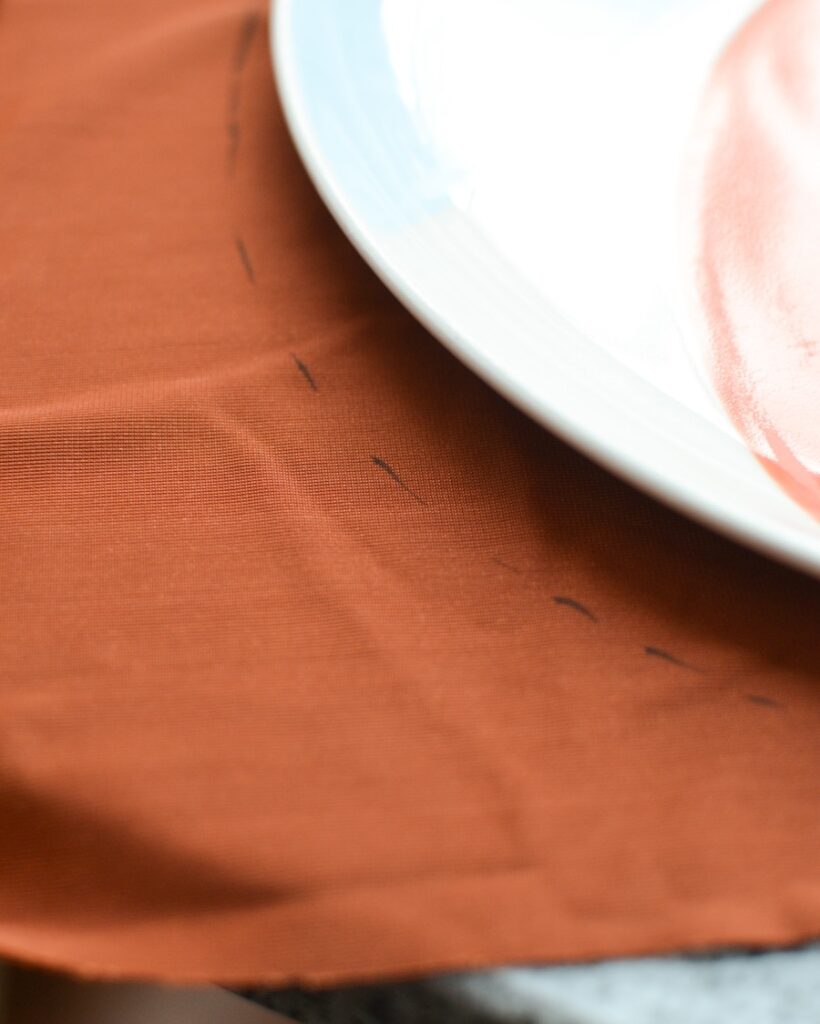
- Something circular to draw round (go as big or as small as you like, I used a dinner and a side plate)
- Pen
- Needle and thread
- Cushion stuffing
- Dried rice
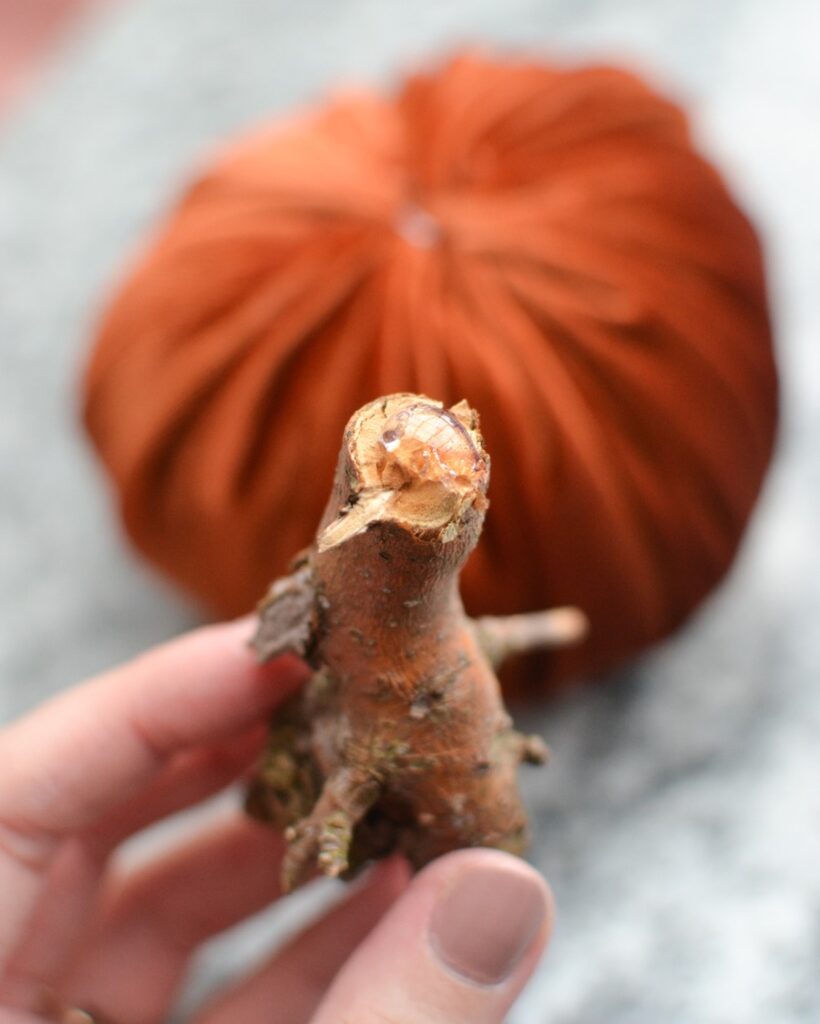
- Twigs (I used some from our apple tree)
- Glue gun or glue
How to:
- Take your chosen fabric and draw round your circular object with a pen, Sharpies are easiest! Cut out the circle.
- Thread your needle and tie a knot at the end. Sew a simple running stitch around the back edge of the circlegathering the fabric as you go.
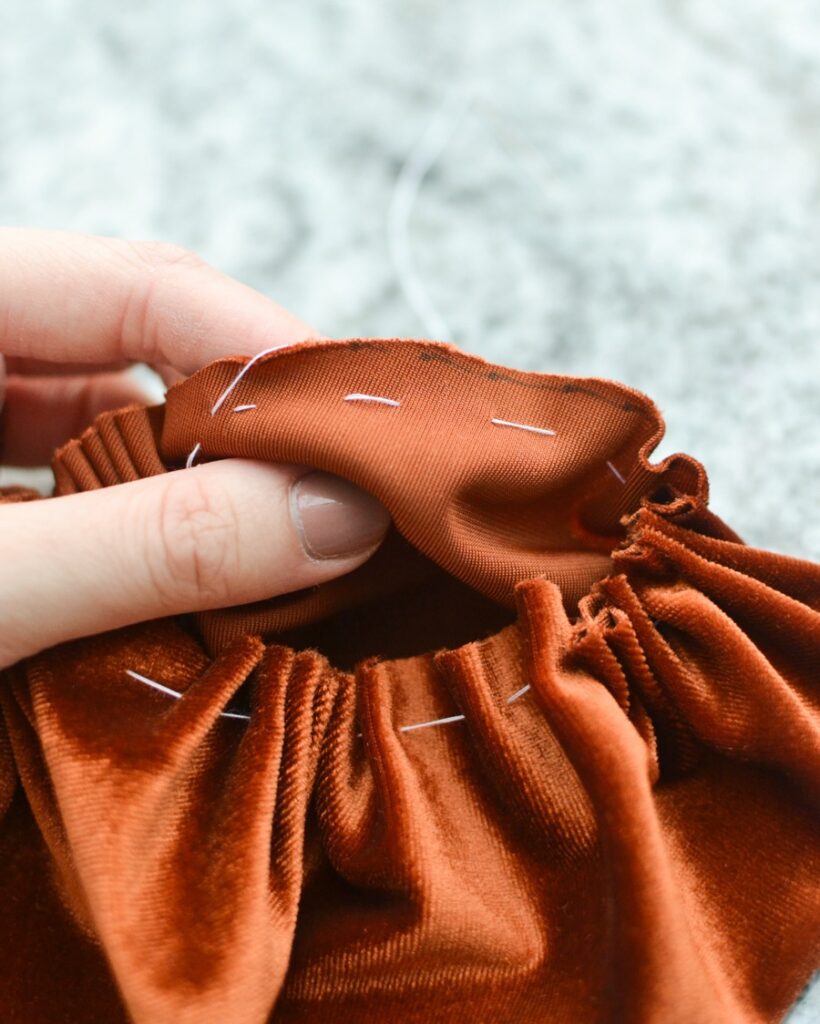
- Once you’ve sewed all around the edge, add a little rice (around 1/4 cup) to weight the bottom of the pumpkin. The use the cushion stuffing to fill it up until you’re happy with the size.
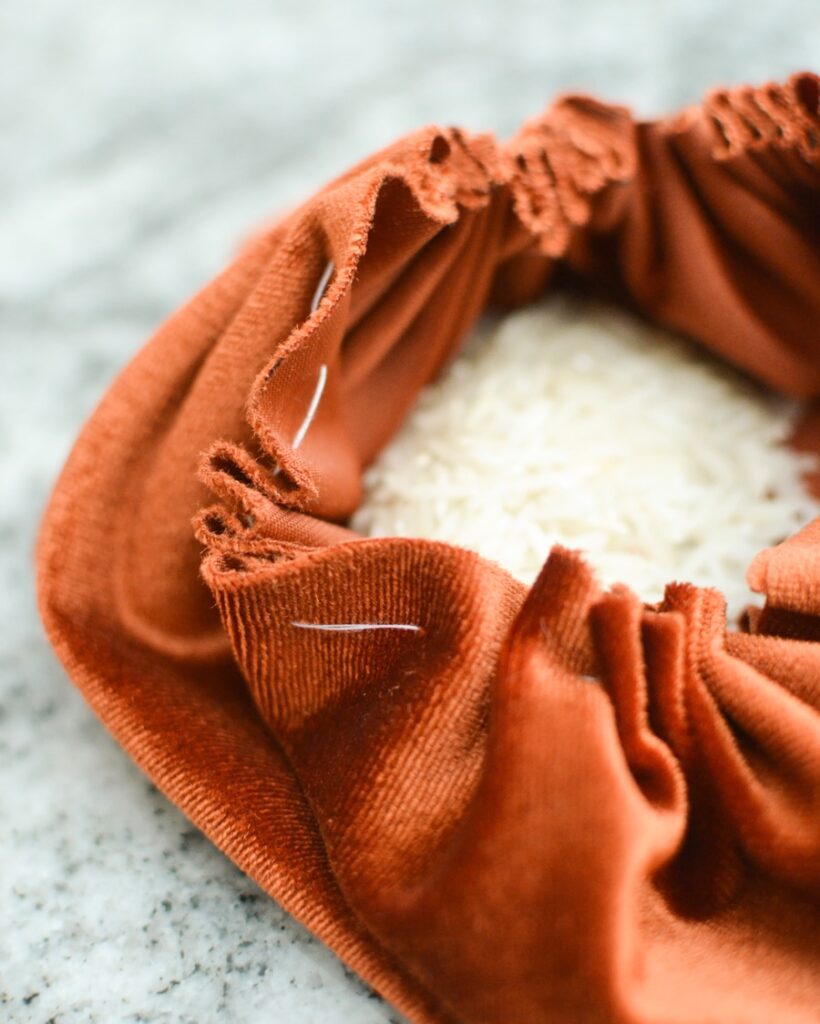
- Gently pull the thread tight so the opening is closed. Sew up the hole with a few stitches and tie a knot to secure it.
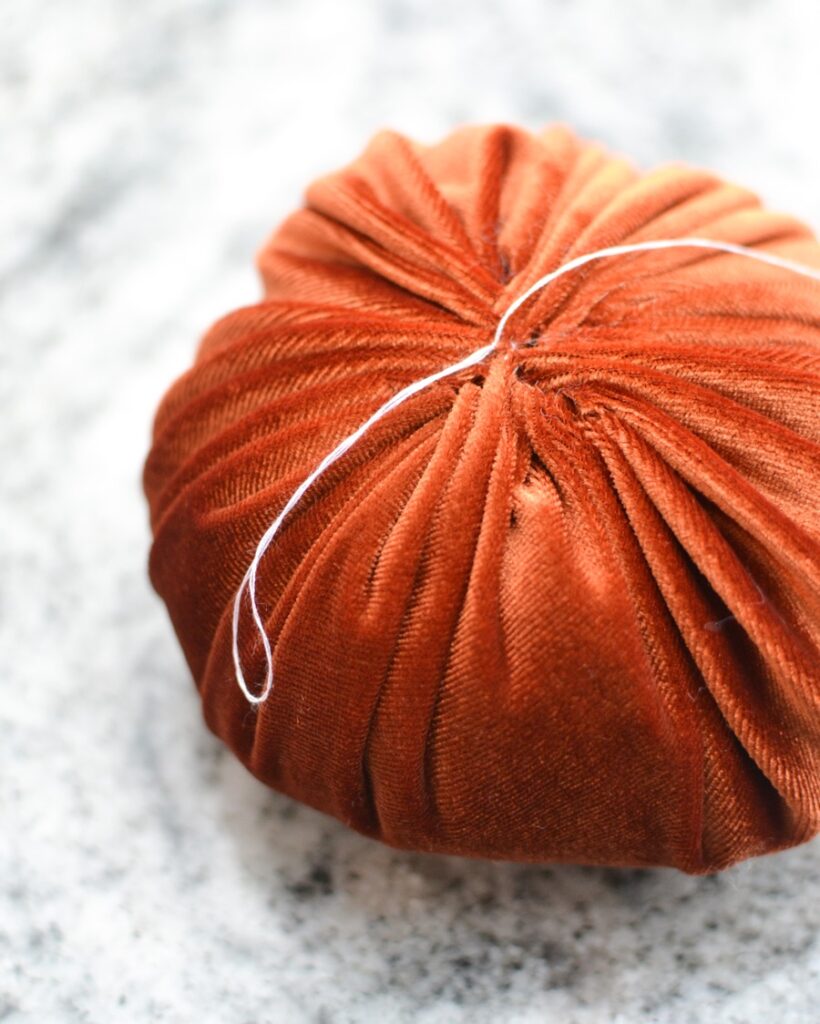
- Use your glue gun or glue to add a blob of glue to your twig, then press this onto the middle of the pumpkin. Wait until dry, if using a glue gun this will only take a few seconds whereas PVA etc will take longer.
- You’re done! Make as many as you like and creative a festive display!
Hope you enjoyed this little nap time Halloween DIY! Let me know if you decide to try it, I’d love to see your velvet pumpkins.